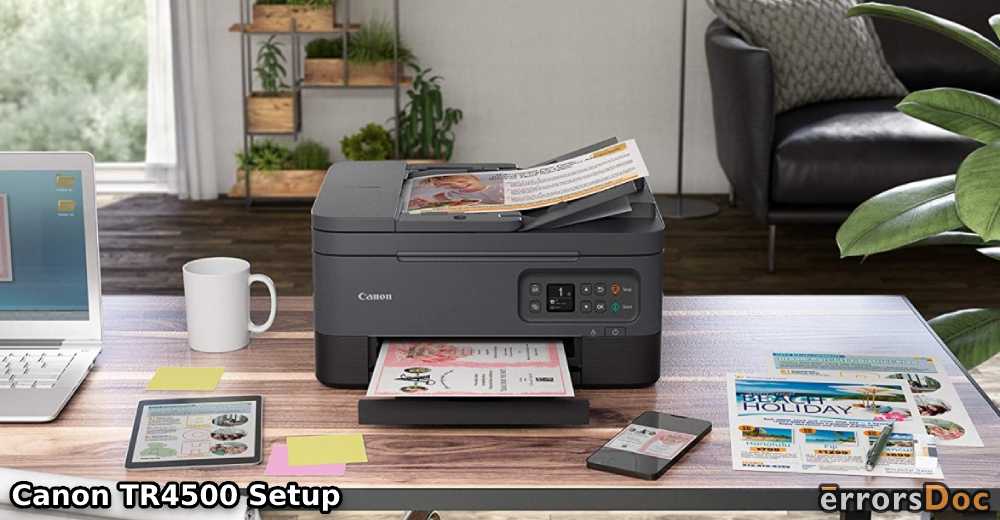
Did you just buy a Canon TR4500 printer and want to set it up quickly? You are at the right platform to seek assistance! In this guide, you will learn what is the procedure for Canon TR4500 setup. We have 3 excellent methods along with steps to get your printer set and running.
Let’s start reading this guide now!
3 Methods for Canon TR4500 Setup
Canon printers, in general, can be set up in different ways. For instance, you can follow the traditional way to set up using the USB cable or go with the wireless options available.
Technology has been improving and bringing up various smart features for smart printers like this one. Therefore, in this guide, we will show you the 3 smartest ways to setup Canon TR4500 printer like a pro.
You can pick any of these three methods to set up your printer with the computer. Then, you can start scanning, printing, and faxing the documents.
Below we will know these methods with a manual procedure to setup Canon TR4500 printer.
Method 1: Canon TR4500 Setup via USB Port
In this method, you will learn to setup Canon TR4500 printer using the USB port. For that, you can do the following:
- Go to the manufacturer’s website and download the compatible print drivers.
- Then, install the printer drivers on your computer.
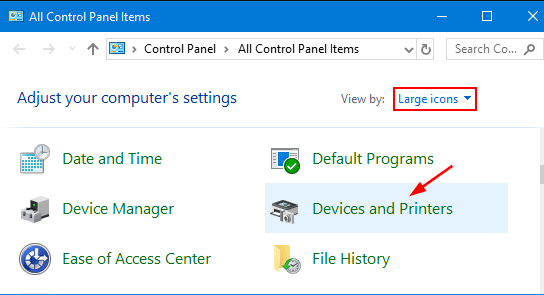
- Now, go to the “Devices & Printer” option on your system. Then, choose your printer name from the list.
- Select the connection method when it appears in the next window.
- Here, you can pick the “USB” connection option and click on the “OK” button.
- Now, connect the USB cable to your printer for Canon TR4500 Setup.
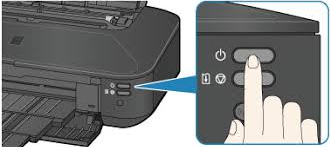
- Then, turn your printer on and wait for it to get connected.
- When done, you can test the print screen displays. For that, click on “Start” and test the prints.
This is the procedure for “how to set up Canon Pixma TR4500” using a USB port. However, most of the users might not have a USB cable at certain times. In that case, you can follow the wireless option. Let’s know more about it in the next method.
Method 2: Canon TR4500 Wireless Setup
For the IJ Start Canon TR4500 setup, you can also connect your printer to the computer wirelessly. All you have to do is choose the Wi-Fi connection this time and run print drivers to start setting up. Read the following steps to know the exact way for how to set up Canon Pixma TR4500 Wirelessly.
- Turn on the Canon printer and press the “Menu” or “Wireless” button. You can hold it for 3 seconds.
- Make sure Wi-Fi is enabled on your Canon printer. Now, you can go to your computer for the Canon TR4500 wireless setup.
- From the manufacturer’s website, download the compatible driver files and run them on your computer.
- Now, click “Next” on the “Start Setup” screen.
- Then, enter the “Username & Password” on the next screen.
- Select the “Start Setup” option and click on the “Next” button.
- Choose the “Region” and click on the “Agree in the Information Request” screen.
- Click on the “Yes” option on the “Check Connection Method” screen.
- When the pop-up appears, click on the “Allow” button.
- Now, you can add your printer from the list of devices and test a print page.
After implementing these steps, you will be able to establish a connection between both the devices using your Wi-Fi. Then, you can print, scan, and perform other tasks on your printer.
Method 3: Canon Printer Setup TR4500 via LAN Connection
In the third best method for Canon printer setup Pixma TR4500, you can use a LAN connection. By using the Wireless Direct option, you can connect your printer to your computer wirelessly. Below are the following steps that you can perform.
- Make sure your Canon printer is turned on. Then, tap on the “Setup” button on the ”Operation panel”.
- Choose the “Device Settings” option.
- Select the “LAN Settings” option.
- Tap on the “Wireless Direct” option.
- Click on the “OK” button.
- Select the “Switch WL Direct” on the next screen.
- When done, tap on the “Done” and “OK” button.
- Now, start your device and enable the “Canon TR4500 Wi-Fi” setup.
- Select the printer with the name of “DIRECT”.
- Then, enter your correct credentials when prompted.
By doing so, you can make connections between the Canon printer and your computer via LAN connection.
Network Device Setup Utility
In case you want to know the procedure of Network Device Setup Utility, then you can follow these steps instructed below.
- Turn on the power of your printer.
- Go to the “Manufacturer’s website” and search for the OS version of your computer and model number of your printer.
- Now, download the “Printer Driver” and run it on your computer.
- While installing the print driver, you can use the “Custom Install” option to select other additional apps to install.
- This will install the “Network Device Setup Utility” with the “MP Driver package”. Thereafter, the procedure will be complete.
In Brief
Here, we have learned the best methods to set up your Canon printer with your computer. You can connect your printer either wirelessly or with the help of a USB cable. The LAN connection also helps you to easily set up the Canon printer. All you are required to do is download and install the print drivers on your computer. Then, choose the connection option as per your preference.
Let us know how we did in this guide! Drop us a comment to share your views.
If you are also concerned about how to set up Canon Pixma TR4500, then this guide will help you and you can start printing, scanning, and faxing your documents.
To know more about Canon printers, read this guide on Canon Printer Offline.