Cleaning the print head on an Epson printer is essential when you notice streaked prints, missing colors, faded text, or horizontal banding in your output. Epson printers use a permanent print head (unlike HP and Canon, which use disposable print heads built into the cartridges), meaning the head must be maintained rather than replaced. Knowing both the automatic cleaning utility and manual cleaning methods gives you the best chance of restoring perfect print quality.
The automatic head cleaning cycle built into every Epson printer forces ink through the nozzles under pressure to clear minor clogs. This method works for light blockages but wastes significant amounts of ink — each cleaning cycle uses roughly the same amount of ink as printing 20-30 full-color pages. For stubborn clogs that survive multiple automatic cleanings, manual cleaning with distilled water or print head cleaning solution is more effective and wastes less ink.
Before starting any cleaning, run a nozzle check pattern to identify which nozzles are clogged. This test page prints a grid of lines for each color — gaps in the lines indicate clogged nozzles. The nozzle check uses minimal ink and tells you exactly which colors need attention.
Run the built-in cleaning: on Windows, right-click the Epson printer in Devices and Printers > Printing Preferences > Maintenance > Head Cleaning. Run it once, print a nozzle check, and if gaps remain, run it one more time. Do not exceed 3 consecutive cleanings — wait 6 hours between sets to let ink settle.
Method 1: Use the Built-In Head Cleaning Utility (Windows)
The automatic cleaning utility is the first step for addressing clogged nozzles. It works for most minor to moderate blockages.
Print a Nozzle Check Pattern
Open Control Panel > Devices and Printers. Right-click your Epson printer and select Printing Preferences. Go to the Maintenance tab and click Nozzle Check. Load plain paper and click Print. Examine the printed pattern — all lines should be solid and unbroken. Gaps or missing segments indicate clogged nozzles for that color.
Run Head Cleaning
If the nozzle check shows gaps, click Head Cleaning in the Maintenance tab. The printer will run for about 60-90 seconds. You will hear the printer's motor and ink pump working. Do not open any covers or turn off the printer during this process.
Print Another Nozzle Check
After the cleaning finishes, print another nozzle check pattern. Compare it with the first one. If the gaps are smaller or fewer, the cleaning is working. Run one more cleaning cycle if needed. If the pattern is fully solid, your print head is clean and ready to use.
Use Power Cleaning (If Available)
Some Epson models offer a Power Cleaning option in the Maintenance tab. This is a more aggressive cleaning cycle that uses significantly more ink but is more effective against stubborn clogs. Only use this if 2-3 regular cleaning cycles did not resolve the issue. After Power Cleaning, wait at least 6 hours before running another cleaning cycle to allow ink to replenish in the print head channels.
Tip: You can also run the nozzle check and head cleaning directly from the printer's control panel without a computer. Navigate to Setup/Settings > Maintenance > Print Head Nozzle Check on the printer's LCD screen. This is useful when the printer is not connected to a computer.
Method 2: Run Head Cleaning on Mac
macOS uses a different path to access the Epson cleaning utility.
Open the Epson Utility
Go to System Settings > Printers & Scanners. Select your Epson printer and click Options & Supplies (or Open Printer Utility, depending on your macOS version). Click Utility, then Open Printer Utility. The Epson Printer Utility window opens with maintenance options.
Run Nozzle Check and Cleaning
Click Nozzle Check to print a test pattern first. If the pattern shows gaps, click Head Cleaning. Follow the same process as Windows — clean, check, repeat up to 3 times maximum. Wait 6 hours before doing another set of cleanings.
Method 3: Manual Print Head Cleaning With Distilled Water
When the automatic cleaning utility fails to clear stubborn clogs (typically caused by dried ink from prolonged non-use), manual cleaning is the next step. This involves soaking the print head nozzles to dissolve dried ink.
Prepare the Materials
You will need: distilled water (not tap water — minerals in tap water can cause further clogging), paper towels, a shallow container or tray, and optionally, a print head cleaning solution (available online from brands like InkOwl or PrintHead Hospital). Warm distilled water works better than cold for dissolving dried ink.
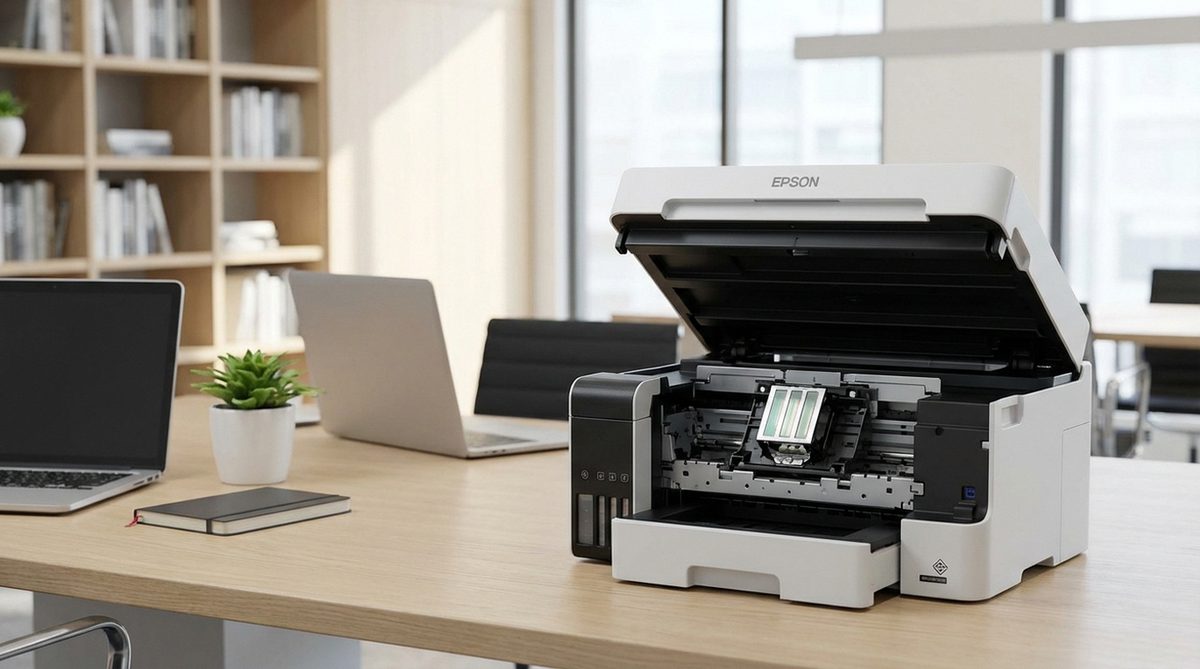
Access the Print Head
Turn on the printer so the carriage moves to the cartridge-change position. Unplug the power cord while the carriage is in the accessible center position. Open the printer cover and carefully remove all ink cartridges, noting their positions. On most Epson models, the print head is permanently attached to the carriage — you will clean it in place.
Soak the Print Head
Fold a paper towel into a pad and place it under the print head (on the carriage's parking pad area). Dampen another paper towel with warm distilled water and gently press it against the bottom of the print head where the nozzles are. Let it sit for 10-15 minutes to dissolve dried ink. You should see ink dissolving onto the paper towel — this is normal and means the cleaning is working.
Flush the Nozzles (Advanced)
For severely clogged heads, use a syringe (without a needle) filled with warm distilled water or cleaning solution. Locate the ink inlet ports on top of the print head (where the cartridges connect). Carefully push a small amount of fluid through each port using the syringe. You should see fluid dripping from the nozzles below. Do not use excessive pressure — gentle and slow is key.
Reassemble and Test
Blot the bottom of the print head with a dry paper towel to remove excess moisture. Reinstall the ink cartridges in their correct positions. Plug the printer back in and turn it on. The printer will run its initialization cycle. Run 1-2 automatic cleaning cycles, then print a nozzle check to verify the results. If significant improvement is visible but some gaps remain, repeat the manual soaking process.
Warning: Never use rubbing alcohol, Windex, or other household cleaners on Epson print heads. These products can dissolve the adhesives and coatings inside the print head assembly, causing permanent damage. Use only distilled water or purpose-made print head cleaning solutions.
Why Does This Problem Happen?
Epson print head clogging occurs for several common reasons:
- Infrequent printing: This is the number one cause. When an Epson printer sits unused for more than 1-2 weeks, ink in the microscopic nozzles begins to dry and solidify. Printing at least one page per week prevents this.
- Air bubbles in ink lines: Cartridge changes can introduce air into the ink delivery system. These air pockets block ink flow and cause gaps in the nozzle check pattern. The automatic cleaning cycle usually purges air bubbles.
- Third-party or refilled ink: Non-genuine inks may have different viscosity or drying characteristics than Epson inks, leading to faster clogging. Some third-party inks contain particles that can permanently block the fine nozzle channels.
- Environmental conditions: Extremely dry or hot environments accelerate ink drying in the nozzles. Keep the printer in a climate-controlled room away from direct sunlight and heating vents.
- Expired ink cartridges: Ink that has passed its expiration date may have changed consistency, making it more prone to clogging. Always check the expiration date printed on the cartridge package.
Frequently Asked Questions
Only clean the print head when you notice print quality issues. Running the cleaning utility unnecessarily wastes ink. Instead of preventive cleaning, print at least one page per week to keep ink flowing through the nozzles. If you print regularly, you may never need to run a cleaning cycle.
Running 2-3 cleaning cycles in a row is safe. After that, wait at least 6 hours before cleaning again — this allows ink to flow back into the print head channels. Excessive continuous cleaning can overheat the print head and waste entire cartridges of ink. If 6-8 total cleanings do not resolve the issue, manual cleaning or professional service is needed.
On most consumer Epson inkjet printers (EcoTank, Expression, WorkForce), the print head is permanently attached to the carriage and should not be removed. However, some professional Epson models have removable print heads. Check your printer's service manual before attempting to remove the head — improper removal can cause irreversible damage and void your warranty.
Regular Head Cleaning uses a moderate amount of ink and pressure to flush the nozzles. Power Cleaning uses significantly more ink (up to 3-5 times as much) and higher pressure for more thorough clog removal. Power Cleaning is available on some Epson models and should only be used as a last resort before manual cleaning, as it rapidly depletes ink cartridges.
No. Vinegar is acidic and can corrode the delicate metal components in the print head. Only use distilled water or commercially available print head cleaning solutions that are specifically formulated for inkjet printers. These solutions have the correct pH and composition to dissolve dried ink without damaging the head.
Horizontal lines or banding that persist after cleaning may indicate a print head alignment issue rather than a clog. Run the Head Alignment utility from the Maintenance tab. If the lines only appear with specific colors, those nozzles may be partially clogged — try the manual soaking method. In some cases, the print head may be permanently damaged and need professional replacement.
Yes. Epson printers run a brief automatic maintenance cycle every time they are powered on. This mini-cleaning helps keep the nozzles primed and prevents light clogs. This is why you should avoid turning your Epson printer on and off frequently — each power-on cycle uses a small amount of ink for the maintenance routine. Leaving the printer on (or in sleep mode) is more economical.
In normal room conditions (65-75°F, moderate humidity), nozzles can begin drying within 1-2 weeks of non-use. In dry, warm, or air-conditioned environments, drying can start in as few as 5-7 days. The capping station inside the printer helps slow this process, but it is not airtight. Regular weekly printing is the best prevention.
For budget Epson models (under $100), the cost of a professional head cleaning service ($50-100) may approach the price of a new printer. Try the free methods first (automatic cleaning and manual distilled water soaking). If those fail, a cleaning solution kit costs $10-20. Only consider replacement if manual cleaning fails completely and the printer is out of warranty.
Severely clogged print heads generally do not cause error messages — they just produce poor quality output. However, if ink dries in the ink delivery tubes or the waste ink pad sensor detects an issue related to cleaning cycles, you may see error codes. Specifically, running too many cleaning cycles can trigger a "Waste ink pad full" error, which requires a service tool to reset.