The users of QuickBooks will know that this software comes with an enormous range of features. Among many of its useful features, a time-efficient feature includes the creation of QuickBooks 1099 forms. 1099s are QuickBooks tax forms that have to be filed with the IRS for paying the contractors.
If you are interested in knowing how to make the 1099 forms in QuickBooks, then you will have to stay connected with us. Also, if you are planning to read the complete post, then you can get educated about how to e-file these forms, print them in QuickBooks Online and QuickBooks desktop, and a lot more.
In addition to the method to create 1099 in QuickBooks Online, we will also be studying other methods. Below you can get a glimpse of them:
How to Create 1099 in QuickBooks?
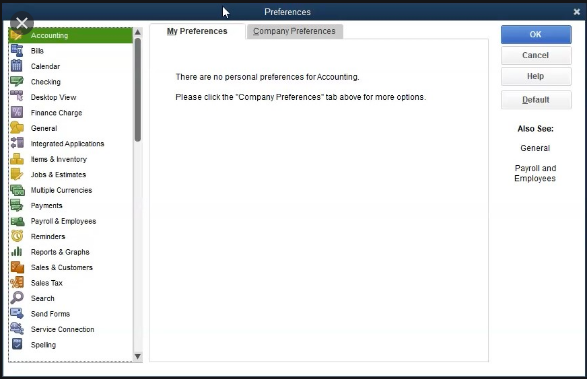
In order to create 1099 in QuickBooks, you can carefully read through this section. You can launch QuickBooks. In Preferences, you will find Tax: 1099. After selecting this option, you can visit the Company Preferences tab and access the menu of Preferences. From the Vendor Center in the Vendor option, you can add and edit the information of the vendor and you can also change the vendor in Quickbooks. After doing a few more steps, the creation of 1099 in QuickBooks will be complete.
- In “QuickBooks”, click on “Edit”.
- Next, click on the “Preferences” option.
- Click on the option of “Tax: 1099”.
- Go to the tab of “Company Preferences”.
- Open the menu of “Preferences”.
- In the toolbar, from the “Vendor” option, select “Vendor Center”.
- Click twice on the vendor for adding the information and editing the details of the vendor.
- Move on to the section of “Tax Settings”.
- For saving the information you have updated, press “Ok”.
- Repeat the steps we have described above for every vendor.
- When you have added a vendor, click on the “Tax:1099” option.
- Tap the “Get Started” button.
- With the help of the checkboxes for the vendors eligible for 109, you can select them.
- Now, hit the “Continue” button.
- Select “Show All Accounts”.
- Select the accounts required for mapping with 1099 and those which you need to omit.
- Press the “Continue” button.
- Go through the payment for the purpose of exclusion.
- Now, hit “Continue”.
- For seeing the detailed information of the vendor, click twice on it.
- After the information has been confirmed, press “Continue”.
- Choose an option from the e-filing and print option.
How to Prepare 1099 in QuickBooks Desktop?
A walkthrough of preparing 1099 forms in QuickBooks Desktop has been elaborated in simple language here. You can first click on Vendors, select the 1099 Forms, and then pick the option of Print or E-file 1099 Forms. After making a backup, you can tap Get Started and start making the 1099 form on QuickBooks Desktop:
Must Read: How to Take Backup and Restore Files in QuickBooks?
- To initiate this process, click on “Vendors”.
- Choose “1099 Forms”.
- Click on “Print/E-file 1099 Forms”.
- In the next step, you have to prepare a backup.
- Tap on “Get Started” for creating the 1099 form.
Important: If you wish to prepare “1099-MISC” and “1099-NEC” forms, you can repeat these steps.
Pro Tip: Changes have been introduced in the 1099 forms as well as the boxes in 2021 for the 2020 tax year. It will be suggested to carefully select the forms.
- Choose the vendors which require the 1099 form.
- Press “Continue”.
- Ensure the right information of the vendor. In case there are any errors in the information, you can edit to correct it. For this, you can double-tap on the section you want to update.
- Tap “Continue”.
- Map the accounts for vendor payment.
- In the section of “Apply Payments to this 1099 Box”, press the dropdown option.
- Choose the account to which the payments have to be linked.
Important: In case any box is grayed out, it may have been mapped to any other form of 1099. you can map the accounts to a single 1099 form. Then press “Continue”.
- In case you witness a message in red colour informing that the settings mismatch with the thresholds of IRS, click on “Show IRS 1099-MISC Filing Thresholds”. Then select “Reset to IRS Thresholds”.
- For exclusion, go through the payment information.
- For viewing the detailed reports, click on “View Included Payments”/”View Excluded Payments”.
- Click on “Continue”.
Important: For viewing the vendors not meeting with the IRS threshold, you can click on “View Summary Report”.
- Choose either the “Print 1099s” option of the “E-file” option.
Pro Tip: In case you are choosing the “E-file” option, then proceed to the upcoming section for knowing the further steps.
How to E-file 1099 Forms in QuickBooks Desktop?
E-filing the QuickBooks tax forms 1099 can be simply done by tapping on the option Go to 1099 E-file Service. From the Tax1099 landing page, you can access the account. Thereafter, you can import the data. Afterwards, you can fill in the information for submitting the 1099 form with your respective state. After uploading the vendors, you can press Next and rectify the errors.
Read the further steps below.
- Once the 1099 form has been prepared, click on “Go to 1099 E-file Service”.
- On the landing page of “Tax1099”, log in to /sign up for the “Tax1099” account.
- “Tax1099” will guide you to import the data from QB Desktop.
- Follow the on-screen prompts to finish importing the data.
- Choose the vendor name. Alternatively, you can press “Edit”. Then click on “Update”.
Important: When you make changes to “Tax1099”, they will not be present in the company file of QuickBooks.
- For filing 1099s with the state, input the information as per the state boxes.
- The vendors which have to be uploaded to the e-file should now be selected.
- Press “Next”.
- In case any error has been made, you will see a message. After making the corrections, you have to choose the vendors one more time.
- Click on “Next”.
- In the “Date” column, you can tick the box for choosing the vendors.
- Tick the box below “Email Recipient”/”USPS Mail” for sending the copies to the vendors or recipients.
Important: In case “USPS Mail” is selected, an additional fee may be applicable.
- Click on “Download Multiple PDFs” for providing the vendors with the copies.
- For filing the form with your respective state, select it now.
- Click on “Calculate Tax1099.com Fee” or press “Next”. After doing so, you can view the complete filing fee.
- On the “Payment” page, fill in the information for the payment.
- Click on “Pay & Submit” for e-filing.
After doing the above 17 steps, you will have successfully learnt to e-file QuickBooks 1099 forms.
How to Print 1099 in QuickBooks Online?
Allow us to quickly take you through a short method to print the 1099 form in QuickBooks Online. Begin with making the form. Then choose the option named I’ll File Myself. After selecting the kind of form, check the alignment of the form. It will be advisable to print a sample. You can click on the option of Print Sample on Blank Paper. After confirming the contractor, you can press Print on 1099 forms and then click on Print.
- The first step is to create 1099 in QuickBooks Online.
- Click on “I’ll File Myself”.
- Select the kind of form you want to print.
- Ensure the proper alignment of the forms. For this, you can choose the “Print Sample on Blank Paper”.
- If the print sample seems to be fine, then click on “Yes, Looks Good”.
- If the print sample’s alignment is not correct, then click on “No, it doesn’t Line up”.
- For repairing the alignment problems, follow the instructions given on the screen.
- Press “Next”.
- Ensure that you have selected the correct form for printing.
- Click on “View Selected 1099 Contractors”.
- Tap “Print on 1099 Forms”. Then press “Print”.
- Now, press “Next”.
- Then click on “Done”.
As soon as you complete these steps, you will be able to print the 1099 form in QuickBooks Online.
How to Print 1099 in QuickBooks Desktop?
- Complete the creation of QuickBooks Desktop 1099 forms.
- In the window of “Choose a Filing Method”, click on either the “Print 1099-MISC” button or “Print 1099-NEC” button.
- In the third step, a date range has to be chosen for the forms.
- Then click on “Ok”.
- Choose every vendor for which the 1099 form has to be printed.
- Press the button for “Print 1099”.
Important: If you are printing the form 1096, then click on “Print 1096s”
- In the seventh step, you need to ensure the correct printer settings.
- Press the “Print” button.
Frequently asked Questions
Our readers often ask us certain common questions about preparing 1099 forms in QuickBooks. Below, we have provided the answers to these questions.
These are the QuickBooks 1099 forms which are compatible: QuickBooks 1099-NEC Form – Copy C/2, QuickBooks 1099-NEC Tax Forms Set, QuickBooks 1099 Envelopes – 2up, QuickBooks 1099-NEC Tax Forms Set with Envelopes, QuickBooks 1099-NEC Form – Copy A Federal, Quickbooks 1096 Transmittal Forms, and QuickBooks 1099-NEC Form – Copy B Recipient.
Using the software of QuickBooks, you can get help in e-filing the 1099 forms. In addition to that, you can mail these forms. For mailing it, you will be required to perform the submission of the transmittal 1096 form. Using this form, you can summarize every tax form which you will be submitting for every category.
Everything Considered
QuickBooks 1099 forms are useful for paying the payment to the contractors. Certain users of QuickBooks may require help for creating or preparing the 1099 forms. From the preparation of the QuickBooks 1099 forms to e-filing and printing them, we authored everything you needed in this post. Should you need more help while making, e-filing, or printing these forms, write to us in the comment section.
To find reads related to this one, go through these amazing blogs! Click here to see how you can resolve the error H202 in QuickBooks. Additionally, read how to add a QuickBooks account via time-saving methods.