Creating invoices in QuickBooks can make your life way easier than you think. It is quick, helpful, and very convenient. You can track daily transactions and record them as well for later use. QuickBooks Payments and GoPayment are cherries on the cake. This is why we bring to you this guide to help you create invoice in QuickBooks.
So let’s check out how to create an invoice in QuickBooks right here:
- How to Create an invoice in QuickBooks?
- Create Invoice in QuickBook for Sales Order
- 1. Create Invoice in QuickBooks for Sales Orders using Sales Order Tab
- 2. Create Invoices for the Sales Order using the Invoice Tab
- How to Create an Invoice in QuickBooks for Estimate Order
- 1. Create Invoices in QuickBooks for the Estimate using Estimate Tab
- 2. Create Invoice in QuickBooks using Invoice Tab for the Estimate
- How to Create Batch Invoices in QuickBooks?
- How to Create a Recurring Invoice in QuickBooks Online?
- How to Create a Custom Invoice in QuickBooks?
- How to Create Invoice from Timesheet?
- How to Create Automatic Invoices in QuickBooks?
- How to Create a Past Due Invoice in QuickBooks?
- How to Create a Deposit Invoice in QuickBooks?
How to Create an invoice in QuickBooks?
To create invoice in QuickBooks for estimates or sales orders, use the A/R workflow. Here are the steps to do it:
- Go to the “Home” or the “Customers” option.
- Click on the “Create Invoices” option.
- Choose the customer job or customer using the “Customer: Job” drop-down. In case you don’t see the job in the list, you can hit the “Add New” button.
- Enter the required details such as Date, Bill to/Sold to, and others.
- Then, click on the “Items” in the “Detail” section.
Note: When you add or select the item, the amount and description are populated automatically (on the basis of unit cost and description during the time of setup). However, you can make changes or delete them when you create the invoices.
You might also need to add discount items to the invoice for your customer. If that is the case then you can follow these instructions:
- Go to the “Home” tab.
- Click on the “Lists” option.
- Choose the “Item List”.
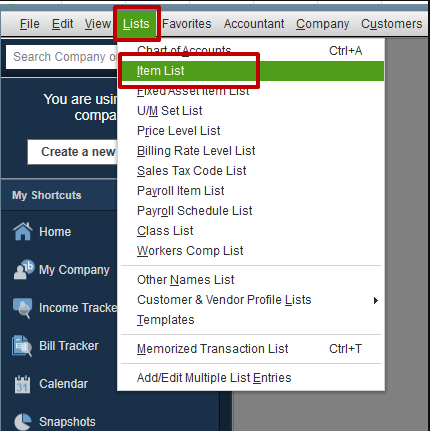
- Now, click right to choose the “New” option.
- Click on the “Type” and pick the “Discount” option.
- Add the “Item Number/Name” and “Description”.
- Add the discount percentage or amount in the “Amount or %” section.
Tip: If the amount varies then you can simply leave this field blank and add the discount amount on the sales forms directly.
- Using the “Account” drop-down, select the income account that you wish to use for tracking discounts.
- Then, choose the right “Tax Code” for the added items.
- Hit the “Ok” button.
- Click on “Save & Close” the window.
This is how you can create an invoice for the customer. If it is required then you can also add discounts for the customers.
Create Invoice in QuickBook for Sales Order
Looking for an answer to the billion dollar “How do you create an invoice in QuickBooks for sales order” question? You can do it through the sales order tab and invoice tab. Here’s how:
1. Create Invoice in QuickBooks for Sales Orders using Sales Order Tab
- Visit the “Sales Order” tab and click on the “Create Invoice” button.
- When a prompt appears on your screen, choose the following options:
- Choose the “Create invoice for all of the sales orders” option. This will add the items from your sales order to your invoice.
- Choose the “Create invoice for selected items” option only when you wish to add only a few items from the sales order to your invoice.
- Now, apply the required changes.
Note: In the items list, you can add a quantity to the To invoice section individually. In case you don’t require the invoice for the items then add Zero as your quantity.
- Click on the ”Save & Close” window.
2. Create Invoices for the Sales Order using the Invoice Tab
- Visit the “Home” tab or click on the “Customer” option.
- Click on the “Create Invoices” option.
- Choose the customer job or customer using the “Customer: Job” drop-down. This will show you the “Sales Order” that is available.
- Now, pick sales orders including items that you want to add to your invoice.
- Then, apply the required changes.
Note: In the items list, you can add a quantity in the To Invoice section individually. In case you don’t require the invoice for the items then add Zero as your quantity.
- Click on the ”Save & Close” window.
These are the two ways to create the invoice for the sales order. Depending on your choice, the invoice can be created either from the Invoice tab or the Sales Order tab.
How to Create an Invoice in QuickBooks for Estimate Order
If the customer accepts the estimate and agrees to pay the fixed costs then you can convert the whole estimate to the invoice. You can do it through the estimate and invoice tab. So let’s create invoice in QuickBooks:
1. Create Invoices in QuickBooks for the Estimate using Estimate Tab
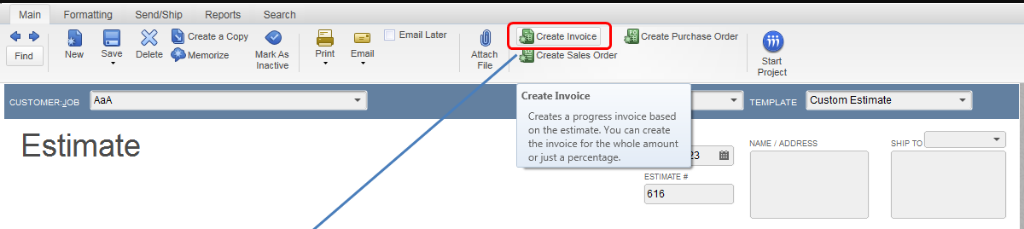
- Visit the “Estimate” tab.
- Click on the “Create Invoice” option.
Note: If you have enabled the program invoicing, you might see a prompt where you will have to pick items and the quantities to add to the invoice. You can select what to add.
- Modify the details as per your requirement when you see the invoice.
- Click on the “Save & Close”.
2. Create Invoice in QuickBooks using Invoice Tab for the Estimate
- Visit the “Home” tab or click on the “Customer” option.
- Click on the “Create Invoices” option.
- Choose the customer job or customer using the “Customer: Job” drop-down. This will show you “Estimates” that are available.
- Now, pick the estimate including items that you wish to add to your invoice.
- Then, apply the required changes.
Note: If you have enabled the program invoicing, you might see a prompt where you will have to pick items and the quantities to add to the invoice. You can select what to add.
- Click on the ”Save & Close” window.
By following these steps, you can easily create the invoice for an estimate either from the estimate tab and the invoice tab.
How to Create Batch Invoices in QuickBooks?
There can be instances when you need to send invoices to your customers. This becomes easy for you to send multiple invoices in one click. All you have to do is create batch invoices in QuickBooks. Here is how to do it:
- Pick the customers you want to send invoices to.
- Navigate to the billing.
- Click on the dropdown and add the name of your group.
- Then, make a new billing group.
- Click on the “Add New” button using the dropdown menu.
- Add the name for the new billing group.
- Now, start adding the customer you wanted to add to this group.
- Click the “Save Group” button.
- Click the “Next” button.
- Mention invoice details for each customer. If required, you can edit or check details in the “Customer Center” option. Just click right on the selected customer, click the “Edit” button and specify details.
- Click the “Next” button.
- Cross-check the invoices list and click the “Create Invoices” button.
When you see the Batch Invoices Summary window, you can email or print the invoices based on the Send method you choose for each customer. Remember the Send method can be checked in the Customer Center. If required, you can print the invoices as well.
How to Create a Recurring Invoice in QuickBooks Online?
If you send invoices to your customers regularly, making QuickBooks recurring invoices online can be helpful here. This is a flexible process for the customers as they can decide how much they need to pay:
- Click on “+ New”.
- Choose the “Invoice” option under the “Customers” option.
- Enter the required information that you want to add at every possible time to your invoice.
- Go to the “Payment” Options to select the type of QuickBooks invoice payment that you wish to accept.
- Click on “Make recurring”.
- Now, you can personalize your recurring invoice and be able to do the following:
- Add the name of the template.
- Select the “Scheduled” option using the “Type” drop-down.
- Select the “Automatically send emails” in the “Options”.
- Adjust the interval.
- Adjust the “Start date”.
Note: Scheduled recurring transactions are created automatically in the first half of a day. Hence, choose a date in the future so that your first instance can be created for the day you have chosen.
- Set the “End date” only if you wish to keep this for an unlimited time.
- Click on “Save template”.
This is how you can create a recurring invoice for the customers. If it is required, you can adjust the setting such as interval, start or end date, etc.
Now, if you want to know how to manage these recurring transactions then you follow these instructions given below:
- Navigate through the “Settings”.
- Click on “Recurring Transactions” in the ”Lists”.
- Then, pick a recurring invoice that you prefer to manage.
This is how you can create recurring invoice in QuickBooks Online, customize the invoice, and manage transactions.
How to Create a Custom Invoice in QuickBooks?
Your very first invoice can be your last impression for your customers. Custom layout, data fields, and design can all work wonders for your business. To create custom invoice in QuickBooks Online, you can pursue these instructions:
- Click on the “Gear” icon located on the top right.
- Then, choose the “Custom Form Styles” option.
This will show you a dashboard for Custom Form Styles. Here, you can edit or manage the invoice templates, sales receipts, and estimates. To know how to create a template from the start, look for the following steps:
- Select the “New Style” dropdown located on the top right.
- Choose the “Invoice” option from here.
- Here, you will find four options to customize the invoice. It includes the following:
- Design: Using the Design section, you can use fonts, logos, color schemes, and adjust the layout.
- Emails: With the Emails section, you can make email messages for your invoice to avoid default messages.
- Content: This section has the company information. Here, you can personalize the information so that the selected information displays in your invoice. Also, adjust the data fields and width of columns.
- Payments: Use this Payment section if you want your customer to pay electronically right from the invoice form. In addition, this method updates automatically when the payment reflects.
- Once done with the invoice customization, preview your invoice template by clicking on the “Preview PDF” button.
- Hit the “Save & Exit” button to return to the dashboard.
The first template for the invoice will be your default template. However, you can change it by clicking on the Arrow icon (located next to the template that you wish to make your default one) and choosing the Make Default option.
Apart from this, you can also design custom invoice templates. For this, you can create a custom logo and personalize the data fields.
How to Create Invoice from Timesheet?
In QuickBooks, create invoice from Timesheet using the Weekly Timesheet feature. This way you can create the invoice based on the billable hours. Follow these steps to understand better:
- Click on the “Create (+)” icon located under the “Employees” tab.
- Then, select the “Weekly Timesheet” option.
Note: In case the person is a contractor then you should add them as a Supplier.
- Select the customer for whom you want to track. If the customer is new then you should click the “Save” button.
Note: If you click the Save button after entering the name, it only saves the name. If you are adding a new customer, you should add additional details by going to the customer’s page.
- Now, add the service item for the customer. You can choose from the provided ones or add the new service item.
- Enter the details for the new item such as price and description.
- Select the bookkeeping account in order to track the item.
- Add the time that the employee used for working for the customer.
- Do the same for other customers.
Once you are done creating the timesheet, you can create a new invoice for each customer. Thereafter, add this timesheet to the invoice and send it to your customers.
How to Create Automatic Invoices in QuickBooks?
With an automated invoice, users do not have to sit on the computer to send invoices to the customer. You can simply create and schedule it for later. Let’s create invoice in QuickBooks:
- Log in to your QuickBooks account.
- Go to the “Edit” button.
- Click on the “Preferences” option from the menu.
- Select the “Invoice Automation” option to open the automation settings.
- If you prefer to create an automatic invoice and want to be informed by QuickBooks then click on the “Create invoices and tell me about it” otherwise choose “Create Invoices and don’t tell me”.
- Now, click on the option to set the day for scheduling the invoices.
The automatic invoices can be sent Daily, Monthly, Weekly, Yearly, or Any Activity. By selecting the preferred settings, you can send invoices to the customer automatically.
How to Create a Past Due Invoice in QuickBooks?
- Go to the “Plus” icon and click on the “Statement” option.
- Click the “Open Item” as the “Statement Type”. This can be done using the dropdown.
- Add the “Statement Date”.
- Select the “Overdue” option from the “Customer Balance Status” dropdown.
- If required then you can click the “Print or Preview” button to get prints.
How to Create a Deposit Invoice in QuickBooks?
To create a deposit invoice, you need to link the bank deposit with the invoice. All you have to do is find and edit your bank deposit and then apply it to the invoice. Here are the instructions:
Find or Edit the Deposit
- Click on the “Accounting” option.
- Then, choose the “Chart of Accounts” option located under the toolbar.
- Now, search for the account where you deposited the payment.
- Then, click on the “View Register” or “Account History”.
- Find and select the deposit and click the “Edit” button.
- Now, scroll down and click on the “Add funds to this deposit” on the “Bank Deposit” window. Then, search for the fund you want to edit.
- Go to the “Received From” column and select the “‘Customer” name.
- In the “Account” column, click on the “Accounts Receivable” option.
- Hit the “Save and Close” button.
Apply Deposit to the Invoice
- Once the deposit is updated, click the “New” button.
- Go to the “Receive Payment” located under the “Customers” menu.
- Choose the name of the customer. Here, you will also see customer invoices along with outstanding credits.
- Enter the “Payment Date”.
- In the “Outstanding Transactions”, click on the invoice you want to mark as paid.
- Click the “Deposit entry” under the “Credits”.
- Hit the “Save and Close” button.
To Sum Up
Hope the guide to create invoice in QuickBooks was helpful and you had no difficulty executing the steps. In case, you have any query drop us a comment.
You can check the following links on QuickBooks invoices and check register: