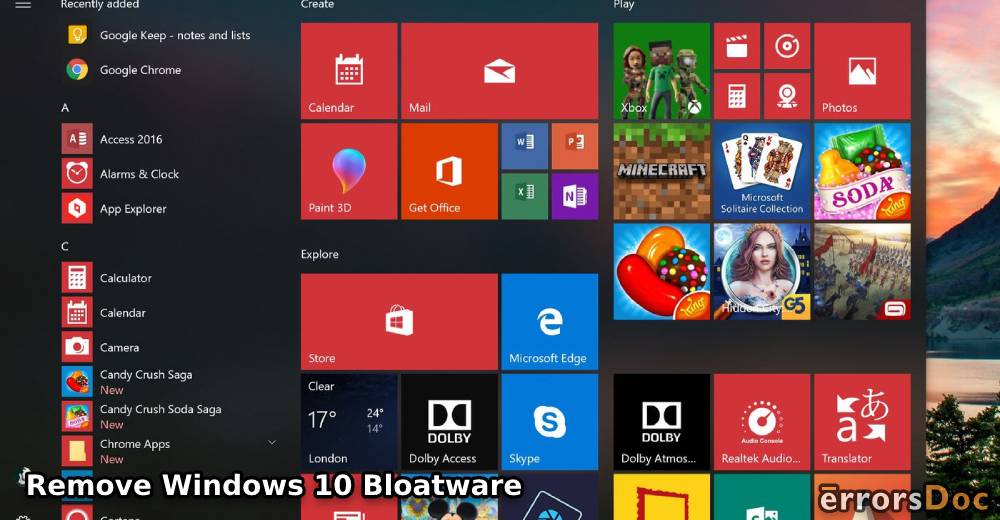
The bloatware on Windows 10 can sometimes cause problems. Many users may not even require certain apps or software. Thus, they prefer removing the bloatware from their Windows 10 computers. You may also be deleting the bloatware on Windows 10 due to similar reasons.
In this post, we have gathered several methods using which you can remove Windows 10 bloatware. While some methods are extremely short and require less time, some are time-taking as well. Depending upon your preference, you can choose the best method to remove bloatware from your Windows 10 PC.
Here, we have displayed all the topics that we will be talking about in this blog with respect to bloatware on Windows 10.
- What is Bloatware on Windows 10?
- Methods to Remove Windows 10 Bloatware
- Method 1: How to Remove Bloatware on Windows 10 Using Fresh Start?
- Method 2: How can I Manually Remove Windows 10 Bloatware Applications?
- Method 3: How can I Remove Bloatware Windows 10 via Powershell?
- Method 4: How to Remove Windows 10 Bloatware Using Add Option?
- Method 5: What is the Procedure to Remove Windows Bloatware Start Menu Ads?
- Method 6: How to Remove Bloatware Windows 10 Start Menu Tiles?
- Method 7: What is the Procedure to Remove Windows 10 Bloatware Using DISM?
What is Bloatware on Windows 10?
Bloatware on Windows 10 refers to unwanted apps as well as software. These apps and software come preinstalled on your Windows 10 computer. In certain instances, it has been seen that bloatware can cause problems on Windows 10. Therefore, many users opt for the removal of it.
Methods to Remove Windows 10 Bloatware
This blog will guide you about how to remove bloatware from Windows 10 computers using different methods. From tools to commands, you can find several convenient methods to remove the bloatware on your Windows 10 computer. You will learn to use Fresh Start, PowerShell, Add or Remove option, DISM, and many other tools and commands for removing the bloatware on your computer.
Method 1: How to Remove Bloatware on Windows 10 Using Fresh Start?
Fresh Start is a tool in Windows 10 computers that comes in handy when the bloatware has to be removed. From the Start Menu, you can open Windows Security. Then you can access the page for Device Performance & Health. Here, the Fresh Start tool will be present. On its link for Additional Info, you can run the tool by accepting the UAC prompt. To remove the bloatware, further directions can be gained from the 10-step procedure shown here.
1. Click on the “Start Menu” on your Windows computer.
2. Look for the “Windows Security” option.
3. Then, hop on to land on the “Device Performance & Health” page.
4. You can find the “Fresh Start” tool here. Below this, you can see the link for “Additional Info”. Press this link.
5. Select the “Get Started” option.
6. The “UAC” prompt needs to be accepted by you.
7. You will see the “Fresh Start UI”. Press “Next’.
8. The list of bloatware on Windows 10 can be viewed in this step. Go through the list to find out what all will be removed from your system.
9. Then press “Next”.
10. Now, hit the “Start” button. Doing so will initiate the reinstallation process on Windows 10.
Very soon, the Windows 10 bloatware removal process will be over.
Method 2: How can I Manually Remove Windows 10 Bloatware Applications?
An easy way to remove the bloatware apps on your Windows 10 computer is by manually finding the app. You can make a list of the apps you do not require on your computer. Then you can find these apps on your Windows 10 computer. You can right-click on them for selecting the uninstall option. And the app will get removed by following this manual approach.
To remove Windows 10 bloatware 2018 step by step, you can read the following.
1. Start your Windows 10 computer.
2. Look for the application that you would like to uninstall.
3. Right-click on the chosen application.
4. Then press the “Uninstall” button. The application will be removed from your Windows 10 computer.
For all the applications you want to remove, you can repeat steps 1 to 4 until all those applications get removed. Thus, you will be able to completely remove Windows 10 bloatware.
Method 3: How can I Remove Bloatware Windows 10 via Powershell?
Many users have used PowerShell to remove Windows bloatware. Using PowerShell for this purpose is simple. You can open it from the Start Menu and run it as the administrator. For every bloatware application, you would like to hide, a code will have to be written. The codes for the apps have been showcased below. You can go through them right away.
1. When your Windows 10 computer is on, go to “Start”.
2. In “Search”, write “PowerShell”.
3. You will see “Windows PowerShell” in the search results.
4. Right-click on “Windows PowerShell”.
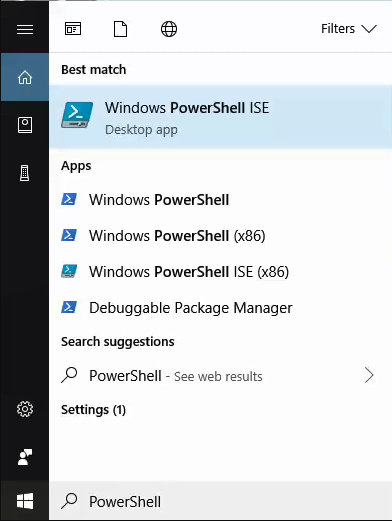
5. Now, choose the option of “Run as Administrator”.
6. Take a look at the things that have to be removed from your computer. Then select them.
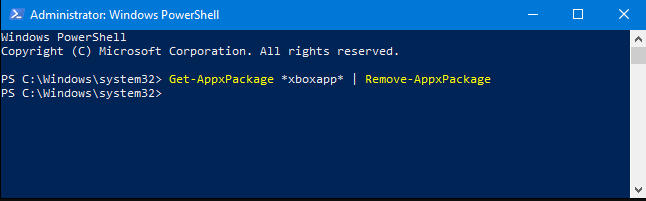
7. The codes given below will have to be provided in “PowerShell”. For every code entered, the application will be hidden from your Windows 10 system.
“Get-AppxPackage -name “Microsoft.ZuneMusic” | Remove-AppxPackage”
“Get-AppxPackage -name “Microsoft.Music.Preview” | Remove-AppxPackage”
“Get-AppxPackage -name “Microsoft.XboxGameCallableUI” | Remove-AppxPackage”
“Get-AppxPackage -name “Microsoft.XboxIdentityProvider” | Remove-AppxPackage”
“Get-AppxPackage -name “Microsoft.BingTravel” | Remove-AppxPackage”
“Get-AppxPackage -name “Microsoft.BingHealthAndFitness” | Remove-AppxPackage”
“Get-AppxPackage -name “Microsoft.BingFoodAndDrink” | Remove-AppxPackage”
“Get-AppxPackage -name “Microsoft.People” | Remove-AppxPackage”
“Get-AppxPackage -name “Microsoft.BingFinance” | Remove-AppxPackage”
“Get-AppxPackage -name “Microsoft.3DBuilder” | Remove-AppxPackage”
“Get-AppxPackage -name “Microsoft.WindowsCalculator” | Remove-AppxPackage”
“Get-AppxPackage -name “Microsoft.BingNews” | Remove-AppxPackage”
“Get-AppxPackage -name “Microsoft.XboxApp” | Remove-AppxPackage”
“Get-AppxPackage -name “Microsoft.BingSports” | Remove-AppxPackage”
“Get-AppxPackage -name “Microsoft.WindowsCamera” | Remove-AppxPackage”
“Get-AppxPackage -name “Microsoft.Getstarted” | Remove-AppxPackage”
“Get-AppxPackage -name “Microsoft.Office.OneNote” | Remove-AppxPackage”
“Get-AppxPackage -name “Microsoft.WindowsMaps” | Remove-AppxPackage”
“Get-AppxPackage -name “Microsoft.MicrosoftSolitaireCollection” | Remove-AppxPackage”
“Get-AppxPackage -name “Microsoft.MicrosoftOfficeHub” | Remove-AppxPackage”
“Get-AppxPackage -name “Microsoft.BingWeather” | Remove-AppxPackage”
“Get-AppxPackage -name “Microsoft.BioEnrollment” | Remove-AppxPackage”
“Get-AppxPackage -name “Microsoft.WindowsStore” | Remove-AppxPackage”
“Get-AppxPackage -name “Microsoft.Windows.Photos” | Remove-AppxPackage”
“Get-AppxPackage -name “Microsoft.WindowsPhone” | Remove-AppxPackage”
The codes shown here are essential for the Windows 10 bloatware removal PowerShell method to work. They have to be correctly filled in as well. Once the code for every app has been entered, the bloatware will get cleared from your Windows system.
Method 4: How to Remove Windows 10 Bloatware Using Add Option?
In this part, you can see how to remove bloatware from Windows 10 by using the Add program or Remove program option. This option is provided in the Start Menu. In this option, you can choose the app for uninstallation and press the button for the same. Within a few seconds, that application will get removed. For all the applications that have to be removed, you can perform the same set of steps.
1. In your Windows 10 computer’s “Search Box”, write “Add”.
2. You see the option of “Add”/”Remove” programs. Click on this option.
3. Scroll below to reach the application that has to be removed.
4. Click on the application and choose “Uninstall”.
5. Repeat the above steps for every application that has to be removed from your Windows 10 computer.
Method 5: What is the Procedure to Remove Windows Bloatware Start Menu Ads?
Many of you may not be fond of the Start Menu ads on your Windows 10 computer. As a part of bloatware, you can turn them off. Your Windows 10 computer comes with the option of Suggestions. This option works as a Windows 10 bloatware removal tool. You can access it in one go from the Start Menu. Then you can find and turn off the option to show the suggestions occasionally.
1. When your Windows PC is on, tap on “Start”.
2. Write “Suggestions” in “Search”.
3. Select “Show Suggestions Occasionally in Start”.
4. Then turn off the option of “Show Suggestions Occasionally in Start”.
Henceforth, you should stop seeing the Windows bloatware Start Menu ads.
Method 6: How to Remove Bloatware Windows 10 Start Menu Tiles?
Now, we will be showing you a method consisting of 3 steps. This is a bloatware remover Windows 10 method that will help you in removing the tiles from the Start Menu. All you have to do is right-tap on a certain tile and choose to unpin it from the Start Menu. And the procedure will be over in the blink of an eye.
1. Right-click on a tile.
2. Click on “Unpin from Start”.
3. Repeat the steps mentioned above for every tile that you want to remove.
After removing all the unwanted tiles by following these 3 steps, the Start Menu of your Windows 10 computer will look as usual.
Method 7: What is the Procedure to Remove Windows 10 Bloatware Using DISM?
DISM or Deployment Imaging Service and Management is of great use when you want to remove Windows 10 bloatware. You can enter the DISM command by opening the Windows PowerShell from the Start. The command will show you all the applications which have been installed on your Windows 10 computer. You can decide the app that you want to get rid of and add its name in the DISM command. The command will start to function and remove the application in much less time.
The command that has to be used has been shown in the following procedure. Let’s read it.
1. Right-clicking on “Start” is the initial step.
2. Choose “Windows PowerShell (Admin)”.
3. Copy the command shown as follows. Then paste it in the interface of “PowerShell”.
“DISM /Online /Get-ProvisionedAppxPackages | select-string Packagename”
4. Press the “Enter” key on your keyboard.
5. A list of all the applications installed on your Windows 10 computer will be displayed. The corresponding name of the app which has to be removed will have to be added to the following DISM command line.
“DISM /Online /Remove-ProvisionedAppxPackage /PackageName”
6. Then hit the “Enter” key.
These steps showed you how to remove Windows 10 bloatware 2017. Using these steps, the app will get removed after you enter the DISM command. Then the procedure will get over.
Note for You: In case you need any help with updating your Windows computer, you can count on us. If you wish to learn how to turn off automatic updates in Windows 7, then tap here to read.
Frequently Asked Questions
We hope that this blog on the methods to remove Windows 10 bloatware 2020 provided you with every piece of information you required. In case we missed out on anything, then you can read through these frequently asked questions or FAQs.
It is said that when you have too many apps and software causing bloatware on your Windows 10 PC, a mess may get created. In addition to that, the bloatware can take up unnecessary space on your Windows 10 system. With the lack of storage space, you may or may not be able to properly use your system. You may even find problems while updating it. Therefore, you can choose to remove the bloatware from your system.
The procedure to remove the regular applications on Windows 10 may not help you in removing the bloatware as well. You can use options like special commands or tools or script to remove bloatware from Windows 10. We have talked about these options in brief in this post.
Yes, it is possible to reinstall the apps which you have removed as a part of bloatware. You can insert a command in PowerShell for completing this purpose. Soon, you will be able to remove all the built-in apps on your Windows 10 computer.
In the methods provided above, we showed you how to remove Windows bloatware. For some reason, you may want to install the built-in apps once again. You can use PowerShell for this purpose. Open PowerShell on your Windows 10 computer. Run it as the administrator. Write the command “Get-AppxPackage -AllUsers| Foreach {Add-AppxPackage -DisableDevelopmentMode -Register “$($_.InstallLocation)\AppXManifest.xml”}” in PowerShell. Then hit the “Enter” key. When you enter this command, the default apps will be installed one more time on your Windows 10 computer. Afterwards, you can restart your computer.
Summing up the Above
Bloatware on Windows 10 basically refers to the apps and software which are unwanted and not necessarily required by you. You may wish to remove the bloatware from your Windows 10 computer due to several reasons.
To remove the bloatware, you learnt several methods in this post. These methods include useful scripts and special commands. By entering these commands, the unwanted applications will get removed. Here, we also showed you certain Windows 10 bloatware removal tools that will make it more convenient for you to remove the unwanted apps. We hope, after reading the complete blog, you have managed to remove the bloatware from your Windows 10 system.
Here is what you should read next. Our experts have found easy ways to help you hide taskbar on your computer. Tap here to read this blog right away.