The chkdsk Windows 10 command is often used by multiple users. This command is quite helpful in resolving problems to improve the efficiency of your computer. Today, we will be learning everything about the Check Disk utility. In this post, we will go through the meaning and different functions of the Check Disk utility. We will understand the parameters of it for effectively using the command.
Then we will look at certain reasons which may, at times, make it tough to run this command on your Windows 10 computer. Lastly, we will learn to resolve these errors for smoothly running the command.
The contents of this post have been summarized below.
- What is Chkdsk Windows 10 Boot Command?
- How to Run Chkdsk on Windows 10?
- Method 1: Run Chkdsk Windows 10 Command via Command Prompt
- Method 2: Running Chkdsk Commands on Windows 10 via My Computer
- Method 3: Using Chkdsk in Windows 10 via Installation Disc
- Method 4: Using Chkdsk Command on Windows 10 via Partition Property
- Why Chkdsk won’t Run on Windows 10?
- How Do I Troubleshoot Chkdsk won’t Run on Windows 10?
- Fix 1: Enabling Chkdsk in Read-only Mode on Windows 10
- Fix 2: Turn off Hybrid Boot on Windows 10
- Fix 3: Upgrade Command and Disable System Restore on Windows 10
- Fix 4: Perform System Restore and Run Chkdsk Windows 10 Command
- Fix 5: Scheduling Chkdsk for Next Boot on Windows 10
- Fix 6: Try Correcting Registry Data on Windows 10
- Fix 7: Try Repairing Autochk.exe File on Windows 10
What is Chkdsk Windows 10 Boot Command?
Chkdsk or Check Disk utility consists of a command. This command is useful for scanning a system’s hard drive. By running this command, Windows 10 users can find out the errors in the hard drive, if any.
The file system’s integrity can be scanned via this utility. Additionally, it can scan metadata of the file system on the volume of a disk. Using the chkdsk commands for Windows 10 repair, the errors can be easily fixed.
Must Read: Check PC Space on Windows 10
Parameters of Windows 10 Chkdsk Command Line
Along with check disk, certain parameters are available which can be utilized. These parameters have been listed below.
1. The “/c” is a parameter which can be applied to NTFS volume.
2. The “f” parameter can help in repairing errors found in a volume.
3. The “/i” parameter can be used for NTFS volume. For checking the index entries, it will be useful.
4. The “/r” parameter will find your hard drive’s bad sectors. It will also recover the information which is readable. This parameter implies “/p” and “/f” as well.
Please Note: You can perform the check disk utility command via Recovery Console as well as Command Prompt. The parameters can be different depending upon the method that is being used. The “/p” parameter will mend the problems in a volume. In the case of standard Command Prompt, this parameter will be read-only. Also, remember that for checking a volume, it is required that it shouldn’t be locked.
On the off chance that a volume is locked, you will see a message saying, “Chkdsk cannot run because the volume is in use by another process. Would you like to schedule this volume to be checked the next time the system restarts? (Y/N)”. You can input “Y” or “N” as per your preference.
How to Run Chkdsk on Windows 10?
There are 4 methods which can be used for running the chkdsk Windows 10 boot command. These methods are the Command Prompt method, My Computer method, Windows 10 installation disc method, and the Partition Property method.
Let us study these methods in-depth.
Method 1: Run Chkdsk Windows 10 Command via Command Prompt
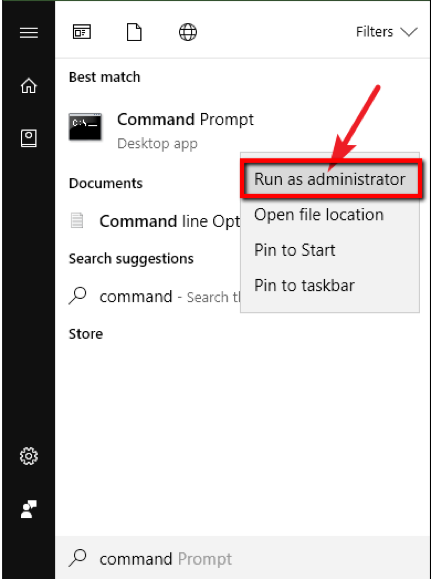
In the first method, we will be running the chkdsk Windows 10 cmd command using Command Prompt. The simplest way to open Command Prompt is through the Search Box of the Start Menu. Upon running it as the administrator, you will be able to enter the command in it. The complete procedure has been mentioned step-by-step below.
1. Start your system and sign into it.
2. Tap the “Windows” key.
3. In “Start”, use the “Search” box to look for “cmd”.
4. Then select “Command Prompt” and right-click on it.
5. Select “Run as Administrator”.
6. You will be required to sign in as the administrator.
7. In the “Command Prompt”, input the following.
“chkdsk C: /f /r /x”
Please Note: In the command stated above, “/f” is responsible for fixing errors, in case found on your system. “/r” will look for sectors which have gone bad. It will recover readable information as well. By adding “/x”, the volume will be forced which you will be checking for the purpose of dismounting. This will be done prior to the process of scanning.
Method 2: Running Chkdsk Commands on Windows 10 via My Computer
You can utilize My Computer as well for launching the chkdsk tool on Windows 10. Prior to opening My Computer, you will be required to boot into Windows. Afterwards, you can pick a drive to scan it. In the Properties of the selected drive, you will find Tools. From there, you can start the process of checking the errors through this tool.
1. Booting into Windows 10 is the step that will initiate this method.
2. You will see “Computer” or “My Computer”. Tap twice on it.
3. The drive which has to be checked needs to be selected now.
4. After selecting the drive, right-click on it.
5. Tap on “Properties” in the next step.
6. Head to access the “Tools” tab.
7. In the section of “Error Checking”, click on “Check”.
8. Then you will receive a message saying “You don’t need to scan this drive. We haven’t found any errors on this drive. You can still scan the drive for errors if you want. Scan Drive.” Press “Scan Drive”.
9. In case you wish to, you can use the drive even when the scanning process is running. Any errors found will be informed to you. You can choose to get them repaired.
Please Note: In case no error has been found, you will receive the message “Your drive was successfully scanned Windows successfully scanned the drive. No errors were found.” In case any error is found, you will find the message “Restart your computer to repair file system. You can restart right away or schedule the error fixing on next restart.”
Method 3: Using Chkdsk in Windows 10 via Installation Disc
Take a look at how to use chkdsk on Windows 10 by inserting the installation disc into your system. Many of you would be having this disc. You can boot your Windows 10 computer through this installation disc. Going further, you can press a key and then make certain selections with respect to Language, Time, Keyboard Method. After doing so, you can repair your computer using the Troubleshoot option.
1. To start, insert the Windows 10 installation disc into your system.
2. Restarting your system is the second step.
3. You will see a message asking you to tap any key. For booting through the disc, you can tap any key on the keyboard.
4. Select a layout for your keyboard, as per your preference.
5. Pick the “Language” you find suitable.
6. Choose “Time”.
7. Then pick a method for “Keyboard”.
8. In the eighth step, press “Next”.
9. Now, you have to select “Repair Your Computer”.
10. The “Choose an Option” screen will show up. On the screen, click on “Troubleshoot”.
After performing these steps, this method will come to an end.
Must Read: Windows 10 Stuck on Restarting? Fix it Now!
Method 4: Using Chkdsk Command on Windows 10 via Partition Property
In the fourth method to run the chkdsk Windows 10 command, we will assist you in using the Partition Property. As you press the Windows key on your keyboard, the menu will open. Here, you will find the Disk Management option. Simply, make a selection of the drive which you would like to scan. Then you can open the Property and start scanning the selected drive.
These steps along with the further steps have been elaborated as follows.
1. Open the “Start Menu” on your Windows 10 computer.
2. Click on the “Disk Management” option.
3. Access the “Disk Management’s” main interface.
4. Choose the drive you would like to scan and repair.
5. Click on “Property”.
6. Click on “Check” in “Tools”.
7. In case of errors, you will be required to check your disk. In case of no errors, you will be informed of the same. However, you can even then perform a check, if you wish to do so. Select the “Scan Drive” option.
8. When the check has been completed, you can press “Close”.
9. If the errors were discovered on the drive, you can restart your computer for repairing them.
Why Chkdsk won’t Run on Windows 10?
The Check Disk utility command may not be running on your system because of these reasons.
1. The command may have been enabled in the read-only mode.
2. Hybrid boot may have been turned on. This may be causing problems in using the command.
3. The command may require you to update it along with disabling System Restore.
4. The registry data being incorrect, the command won’t run.
5. Also, this command may nor properly work if the autochk.exe file is faulty.
How Do I Troubleshoot Chkdsk won’t Run on Windows 10?
The chkdsk command not running problem can be repaired by enabling Check Disk in read-only, disabling hybrid boot, disabling System Restore, repairing the registry data, etc. Along with these, there are other fixes too. Let’s read in detail about these fixes.
Must Read: Windows 10 Can’t Connect to Network
Fix 1: Enabling Chkdsk in Read-only Mode on Windows 10
While using the Check Disk utility command, you may come across the message “Errors found. CHKDSK cannot continue in read-only mode.” In this instance, it will be suggested to include the parameter of “/r” while running the “chkdsk /f” command.
In case you need to use the Check Disk utility on any other volume, the command “chkdsk D: /f” can be updated by including the drive letter.
Fix 2: Turn off Hybrid Boot on Windows 10
The command for Check Disk utility may not work in case hybrid boot has been enabled on your Windows 10 computer. Once you turn it off, no problem should arise while performing the command. To turn it off, you can launch the Command Prompt first. You can input the necessary command for disabling the hybrid boot. After rebooting your computer then, you can successfully implement the Check Disk utility command.
To know the command for disabling hybrid boot and implementing the steps, read here.
1. Go to “Start” by pressing the “Windows” key.
2. Write “CMD” in “Search”.
3. Launch “Command Prompt”.
4. Write “powercfg /h off” in the “Command Prompt”.
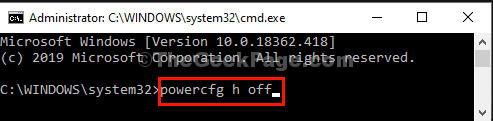
5. Then press “Enter”.
6. Reboot your computer for saving the changes.
7. After rebooting, use the command for chkdsk tool on Windows 10. You will be able to use it without seeing any error now.
Fix 3: Upgrade Command and Disable System Restore on Windows 10
At the time of running the reparar Windows 10 cmd chkdsk command, if you see a message saying that the present drive cannot be locked, then you can ensure that the command has “chkdsk /r”. Now, use the command. If it still fails, then disable System Restore while scanning. You can also disable protection software like firewall.
Fix 4: Perform System Restore and Run Chkdsk Windows 10 Command
Learn how to run chkdsk on Windows 10 command without encountering any error in this section. To use it error-free, You can first do a System Restore. For this, you can open System and Security from the Control Panel. Going further, you will find an option to create a restore point and initiate its procedure. After the System Restore procedure has been done, you can run the Check Disk utility command.
1. Go to the “Control Panel” of Windows 10.
2. Click on the tab named “System and Security”.
3. Now, choose the option of “System”.
4. Click on the “System Protection” tab.
5. The “System Properties” Windows will be available. Choose “System Restore” from the window.
6. Press “Next”.
7. For removing the error Windows 10 startup repair Command Prompt chkdsk, pick a restore point.
8. You will be asked to give confirmation for the restore point. Confirm it and click on “Finish”.
9. For initiating “System Restore”, press “Yes”.
Please Note: After initiating “System Restore”, no interruptions can be made. In case important files have been saved on your Windows 10 computer, you may want to keep a backup of them.
10. When “System Restore” is over, restart your Windows 10 computer to give effect to the changes. Afterwards, you can launch the chkdsk mbr Windows 10 command. It should work now.
Fix 5: Scheduling Chkdsk for Next Boot on Windows 10
Certain Windows 10 users find a message stating that “Chkdsk cannot run because the volume is in the use by another process. Would you like to schedule this volume to be checked the next time the system restarts?” To resolve this, you will be required to write “Y” for running the utility during the next booting process. Thus, you can press “Y” and restart your system.
Fix 6: Try Correcting Registry Data on Windows 10
Chkdsk commands on Windows 10 can fail to work if the registry data is not correct. You can easily repair it by opening the Run dialog box. You can enter the command to correct the registry data. Every detail associated with the procedure to correct the registry data for fixing the Check Disk utility command not working issue has been provided below.
1. Open “Run”. For this, press “Windows” and “R” keys.
2. Write the following in “Run”.
“regedit.exe”
3. Press the “Enter” key in the third step.
4. The Registry Editor will be open now. Visit the location mentioned as follows.
HKEY_LOCAL_MACHINE\SYSTEM\CurrentControlSet\Control\Session ManagerHKEY_LOCAL_MACHINE\SYSTEM\CurrentControlSet\Control\Session Manager.
5. Click two times on “BootExecute” on the right.
6. Set the value data to “autocheck autochk*”.
Your problem should have been solved by now.
Fix 7: Try Repairing Autochk.exe File on Windows 10
In the last fix for the chkdsk commands Windows 10 repair not working error, we will repair the autochk.exe file. When this file is faulty, it may be the cause of this error. Repairing this file requires opening the File Explorer. Here, you can locate the Windows.old folder. You can find the file in the folder and repair it.
Related Topic: Clear Temp Files on Windows 10
Now, let’s see how this can be done step by step.
1. Click-open “File Explorer”.
2. Select “This PC”.
3. Open the folder named “Windows.old”. This will be available in the location “C: \Windows.old”.
4. Find the “autochk.exe file” in it. Then right-click on it.
5. Open the properties of the file. Now, the ownership will have to be modified to your account.
6. The “autochk.exe” file needs to be copied to the folder named “C:\Windows\System32”. Then replace it.
Please Note: As an alternative, the “autochk.exe” file can be copied from the older version of Windows system, if your computer is not working. Then you can replace it.
4. You can also try to copy the autochk.exe file from an older Windows system version to this not working PC and replace it.
5. Lastly, you can reboot your Windows 10 computer.
Conclusion
By now, you would have understood that Check Disk utility works as an efficient tool. You can use the command for it by implementing four methods. Sometimes while running this command, it may not properly run or not run at all. You can utilize fixes like repairing the autochk.exe file, scheduling chkdsk, etc., for making this command run on your Windows 10 computer.
Read next about fixing the critical process died Windows 10 error. Certain users also report “My cursor disappears in Windows 10“. If the same is happening with you as well, then you can read the solutions here to fix it.
WOW, Perfect guide so far!
I do not know about this, today I found out through your post. Thank you very much to the writer for the complete and step-by-step instructions.