The best way to boost your productivity while working on a system is to use a second monitor. However, in certain moments, your Windows 10 does not detect second monitor. If you find this “second monitor not detected” error then you can fix it on your own with the help of our guide.
So let’s find out why your Windows 10 is not detecting the second monitor and steps to make it work again. Here we go:
Why Does My Computer Not Detect My Second Monitor? – Primary Reasons
Is your computer not detecting second monitor on Windows 10? It may be due to the outdated video drivers. Or probably, you have installed the latest drivers incorrectly. In such cases, your computer might not be able to mirror your desktop to the second monitor. Fortunately, you can fix this “Windows not detecting second monitor” error by performing the troubleshooting steps.
How to Fix When PC Not Detecting Second Monitor?
To solve this error, we are going to implement the following steps mentioned below.
- Get Back to the Old Video Driver
- Update The Video Driver
- Check the Monitor Refresh Rates
- Change the Project Mode
These are the four simple ways to make your monitor work with the second screen. Below we will understand these methods with a manual procedure. Let us know how to fix if second monitor not detected on Windows 7 or Windows 10.
Fix 1: Get Back to the Old Video Driver
There are instances when installing the latest video drivers might not work on Windows 10 as expected. As a result, your second monitor is not detected on Windows 10 HDMI. To get rid of this issue, you can simply go back to the previously installed video drivers. So when your Windows 10 does not detect second monitor, you can follow the steps mentioned below:
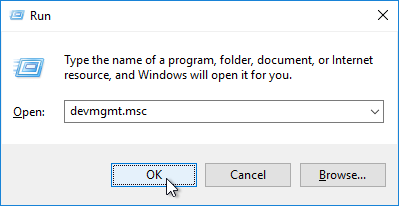
- To get started, you can use the Windows key along with the R key on your keyboard. This will bring up the Run dialog box on your screen.
- Next to this, you can type devmgmt.msc in the text field and hit the Enter button.
- Now, you will see the Device Manager window. Here, under the Display adapters section, you can click right on the device software.
- Then, you can select the Properties option.
- At this point, you can click on the Driver tab and hit the Roll Back Driver option.
- After this, you can follow the instructions as displayed on your screen.
- Once you are done, the Roll Back Driver will be grayed out and you can install the previous video driver from the official website of manufacturers. Later, you can update the video driver.
- When the process of video driver installation is completed, you can restart the computer and check if your computer is detecting the second monitor.
This is how you can fix if your second monitor is not detected on Windows 7 or Windows 10. In case, your Windows 10 is not detecting the second monitor even after rolling back to the old drivers then you should get the right video driver for your computer and install them with the latest version. Let us know more in the next step.
Fix 2: Update The Video Driver
If you have rolled back to the old video drivers and yet your Windows 10 not detecting second monitor then it is likely you have installed the wrong driver. To get the correct driver, you can follow these two types of ideas for updating the drivers:
- Manual driver update
- Automatic driver update
Manual Driver Update
In the manual method, you can directly visit the manufacturer’s website. Then, you can search for the most recent driver for your video card. After this, you can update the video drivers manually.
Note: Make sure that you choose the video driver that is totally compatible with your Windows 10 PC.
Automatic Driver Update
A few of the users are not tech geeks and instead of updating the drivers manually, they look for the automatic options. Luckily there are tools like Driver Easy that makes your task quick as well as automatic. If you are one of them who wants to go with automatic driver update then you can go through the following steps:
- First of all, you can download and install the Driver Easy on your computer.
- Then, you can run Driver Easy and hit the Scan Now button. This will scan and detect problems with your drivers installed on your computer.
- Once it is done detecting the drivers, you can click on the Update All button. This will download and install the right version of your drivers automatically.
- Thereafter, you can restart the computer and connect the two monitors. If you see the computer is not detecting the second monitor on Windows 10 then you should check refresh rates of your screen.
This is how you can fix it when the second monitor is not detected on Windows 10 HDMI. After implementing this step if your Ubuntu is not detecting the second monitor then make sure that the monitor refresh reates for both the monitors remain same.
Fix 3: Check the Monitor Refresh Rates
Screen refresh rate indicates the number that how many times your screen refreshes the images. Hence, monitor or screen refresh rate plays an important role especially when connecting two monitors. However, a few graphics card might not support the refresh rate which as a result cause the “PC not detecting second monitor” error.
In addition to it, your computer not detecting second monitor on Windows 10 because the screen refresh rate for both the monitors is different. To tackle this situation, you need to make sure that the screen refresh rate should be the same on both the monitors. To get this job done, you can do the following.
- The first step is to use Windows key along with I key on your keyboard.
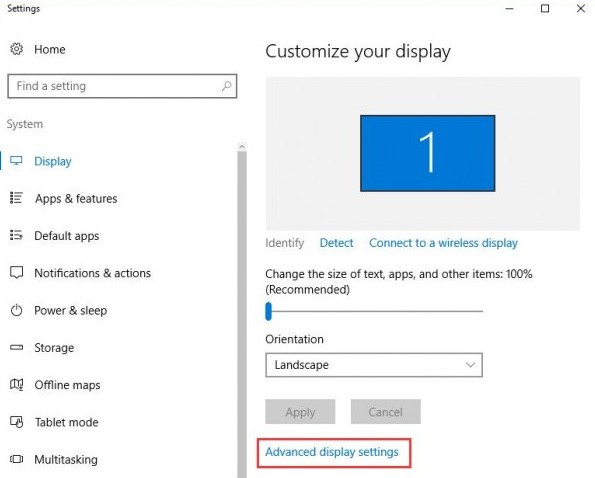
- This will bring the Windows Settings page. Here, you can click on System option.
- Now, you can click on the Advanced display settings option.
- Here, you will see the Display adapter properties for Display 1, click on it.
- In the next step, you can click on the Display adapter properties for Display 2.
- At this point, you can check if the refresh rate of both the screen is same. In case you find the screen refresh rates different then you can change the rate to make it same for both the monitors. Then, you can hit the Apply and OK button. This will surely connect the second monitor to your primary monitor.
In case you find the refresh rates are same but intel HD graphics control panel does not detect second monitor then you can change the project mode. To understand better, you can move to the next fix to find best solution.
Fix 4: Change the Project Mode
When your computer detect the incorrect project mode, it often shows “computer not detecting second monitor Windows 10”. In this scenario, you can simply change the project mode and fix the problem. To do so, you can follow the steps mentioned below.
- As the first step, you need to press Windows key along with P key on your keyboard.
- Then, you can click on the Duplicate option. This will show the same screen on both the monitors.
- In case, you want to get more workplace then you can select the Extend option.
After applying all these methods, you would have got rid of “Windows 10 not detecting second monitor” error. Then, you can expand your screen by using both the monitors.
Conclusion
It is common when the Ubuntu not detecting second monitor. If you are facing the “second monitor not detected” problem then you can fix this problem by implementing the troubleshooting steps mentioned in this article. For instance, you can roll back to the old drivers, update the driver with the compatible version, change the project mode or make sure that the refresh rates of both the monitor are same. This will help you to solve the “Windows not detecting second monitor” error.
Besides that, if your computer turns on but no display is shown then you can go through this curated guide.