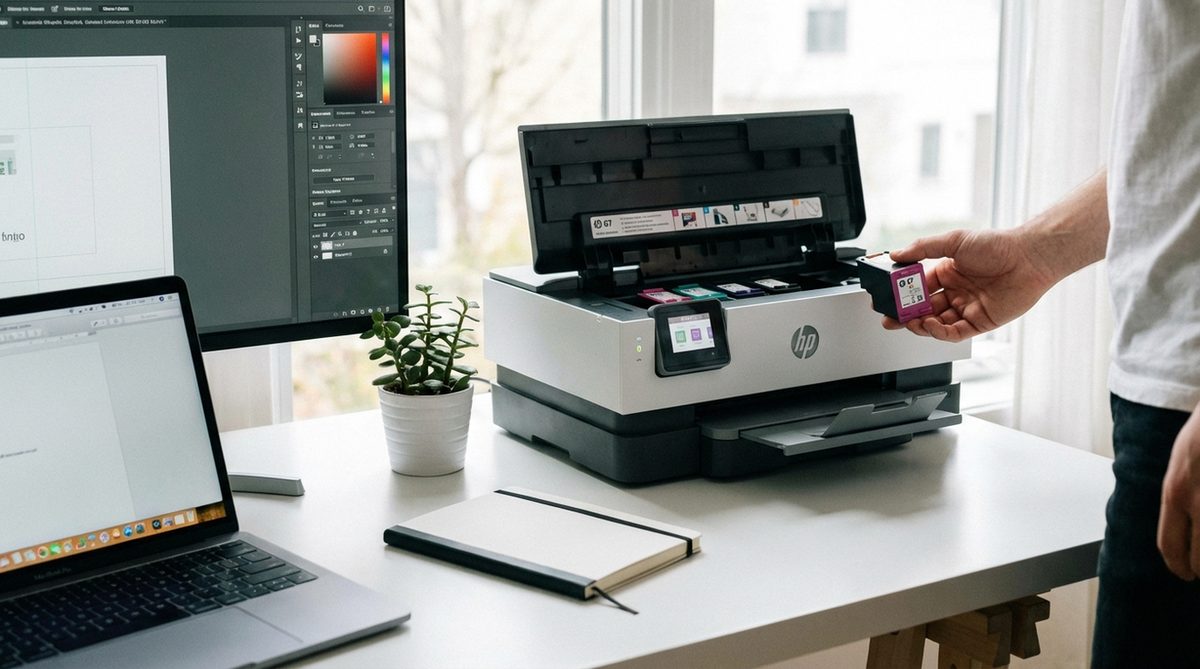
Changing ink cartridges in an HP printer is a straightforward process, but each printer series has slightly different access points and cartridge types. Whether you own an HP DeskJet, OfficeJet, ENVY, or LaserJet, knowing the correct procedure prevents cartridge damage, ink leaks, and error messages. This guide covers the ink replacement process for all major HP inkjet printer series with model-specific instructions.
HP printers use two main cartridge formats: standard individual cartridges (one for black, one for tri-color) and high-yield XL cartridges that hold more ink. Some newer HP+ models require HP original cartridges and will not accept third-party replacements. Before purchasing replacement ink, check your printer's cartridge number — you can find it printed on the existing cartridge, in the printer manual, or by searching your printer model on HP's website.
Replacing ink cartridges at the right time ensures consistent print quality. Most HP printers display a low ink warning when approximately 10-15% of ink remains. You can continue printing past this warning until print quality degrades, but having a replacement cartridge on hand prevents unexpected downtime.
Turn on your printer and open the ink cartridge access door. Wait for the carriage to move to the center. Press down on the old cartridge to release it, pull it out. Remove the orange tape from the new cartridge, slide it into the matching color slot until it clicks. Close the door and run alignment when prompted.
Method 1: Replace Ink in HP DeskJet 2700, 4100, and Similar Models
The HP DeskJet series uses HP 67 or HP 305 cartridges (depending on region). These compact printers have a front-loading cartridge design.
Open the Cartridge Access Door
Turn on the printer and wait until it finishes initializing. Open the front ink cartridge access door by pulling it toward you. The print carriage will automatically move to the center of the printer. Wait until the carriage stops moving and is silent before proceeding.
Remove the Old Cartridge
Gently press down on the top of the cartridge you want to replace. This releases it from the carriage slot. Pull the cartridge toward you and out of the slot. The black cartridge sits on the right side, and the tri-color cartridge sits on the left. Set the old cartridge aside on a piece of paper to catch any residual ink.
Prepare the New Cartridge
Remove the new cartridge from its packaging. Peel off the orange or pink protective tape by pulling the tab. This exposes the ink nozzles and electrical contacts — do not touch the copper-colored contacts or the nozzle area with your fingers, as skin oils can interfere with the electrical connection and block ink flow.
Install the New Cartridge
Slide the new cartridge into the correct slot at a slight angle, nozzle end first. Push it up and forward until it clicks securely into place. The cartridge should sit flush with the carriage. Close the cartridge access door. The printer will detect the new cartridge and may run an automatic alignment process.
Tip: If you are only replacing one cartridge (black or color), you do not need to replace both at the same time. However, having both cartridges installed is required — HP printers will not print if either slot is empty, even if you only need black output.
Method 2: Replace Ink in HP OfficeJet Pro 8000 and 9000 Series
OfficeJet Pro printers use individual ink cartridges (HP 962, 952, or similar) — one for each color: black, cyan, magenta, and yellow. This allows you to replace only the color that runs out.
Open the Front Door
Turn on the printer. Open the front door or lift the ink access cover (location varies by model). The carriage moves to the access position. On OfficeJet Pro 8020/8030 models, the cartridge access door is on the front of the printer. On the 9010/9020 series, lift the scanner unit to access the cartridges from the top.
Remove the Empty Cartridge
Press the tab on the front of the cartridge you want to replace. Pull the cartridge straight up and out of its slot. The four cartridge slots are color-coded: black (far left), cyan, magenta, and yellow (far right). Only remove the cartridge you are replacing.
Install the Replacement
Unpack the new cartridge and remove the orange pull tab. Hold the cartridge with the contacts facing the printer and slide it into the matching color slot. Press down firmly until the cartridge snaps into place. You should hear a distinct click when it is seated properly.
Verify Installation
Close the cartridge access door. The printer's display should show the new cartridge with an updated ink level. If the printer displays an error, remove the cartridge and reinstall it, making sure it is fully seated. If the error persists, clean the electrical contacts on the cartridge with a dry, lint-free cloth.
Method 3: Replace Ink in HP ENVY 6000 and Inspire Series
HP ENVY models use HP 67 (ENVY 6000) or HP 64 (ENVY Inspire) cartridges. The access and replacement process is similar to the DeskJet series.
Access the Cartridges
Power on the printer. Open the ink cartridge access door (front panel on ENVY 6000, top lid on ENVY Inspire). Wait for the carriage to park at the center access position. Do not attempt to move the carriage manually — let the printer position it automatically.
Swap the Cartridge
Press the old cartridge down to release it from the latch. Slide it out of the slot. Remove the protective tape from the new cartridge. Insert the new cartridge into the slot at the correct angle and push it up until it clicks. The label on the cartridge and the label inside the slot should match (black or tri-color).
Run Alignment
Close the access door. The printer will prompt you to print an alignment page. Load plain white paper in the input tray and follow the on-screen instructions. On models without a screen, the alignment page prints automatically. This calibration ensures the new cartridge produces clean, properly registered output.
Warning: Never turn off your HP printer during cartridge replacement. The printer needs to be powered on so the carriage moves to the access position and so it can properly register the new cartridge after installation. Turning off the printer with the access door open can cause the carriage to park in an unreachable position.
Why Does This Problem Happen?
Common issues during ink cartridge replacement include:
- Cartridge not recognized: This happens when the electrical contacts on the cartridge or inside the printer are dirty. Clean both contact points with a lint-free cloth dampened with distilled water. Let everything dry before reinstalling.
- Ink smearing after replacement: New cartridges sometimes produce smeared output for the first few pages as the print head primes. Print 5-10 test pages to allow the ink to flow evenly.
- Incorrect cartridge error: Each HP printer model uses a specific cartridge number. Installing the wrong cartridge type triggers an error. Check the inside of the cartridge access door for a sticker listing compatible cartridge numbers.
- HP Instant Ink issues: If you subscribe to HP Instant Ink, you must use the cartridges provided by the program. Standard store-bought cartridges will not work in printers enrolled in Instant Ink. Cancel the subscription first if you want to switch to retail cartridges.
- Cartridge carriage stuck: If the carriage does not move to the center, turn the printer off and on again. If it remains stuck, gently (and very carefully) move it by hand to check for paper obstructions in the carriage path.
Frequently Asked Questions
Look at the label on your current cartridges (e.g., HP 67, HP 962). You can also find this information inside the cartridge access door, in your printer's manual, or by entering your printer model number at support.hp.com and checking the supplies section.
Most HP printers accept third-party cartridges, though HP discourages it. Some newer HP+ models and Instant Ink enrolled printers require genuine HP cartridges and will block third-party ones. Be aware that using non-HP cartridges may void your warranty and could cause print quality issues.
XL (high-yield) cartridges contain more ink and print significantly more pages than standard cartridges. They fit the same slot and work identically — the only difference is capacity. XL cartridges cost more upfront but have a lower cost per page, making them more economical for regular printing.
This can happen if you installed a refilled or remanufactured cartridge, as the ink level chip may not reset properly. It can also occur if the cartridge was improperly stored or is past its expiration date. Try removing the cartridge, cleaning the contacts, and reinstalling. If the message persists with a genuine HP cartridge, the cartridge may be defective — contact HP for a replacement.
Unopened HP ink cartridges have a shelf life of about 18-24 months from the manufacture date. Once installed, cartridges can dry out if not used regularly. Print at least one page per week to keep the ink flowing and prevent the print head nozzles from clogging. Cartridges left unused in the printer for several months may need to be replaced even if they still have ink.
No — keep the printer turned on. The printer must be powered on so the carriage moves to the center access position where you can reach the cartridges. If the printer is off, the carriage stays parked in its home position behind a cover, making cartridge access impossible or very difficult.
Ink leaks are usually caused by touching the nozzle area or tilting the cartridge at an extreme angle. Clean any spilled ink immediately with a damp cloth — dried ink is much harder to remove. Inside the printer, use a lint-free cloth dampened with distilled water to clean the carriage area. Avoid getting moisture on the electrical contacts.
Most HP printers automatically prompt for alignment after a cartridge change. If not, go to the printer's control panel menu and look for Tools or Maintenance > Align Printer. On Windows, open HP Smart or HP Printer Assistant, go to Printer Maintenance, and select Align Printhead. Load plain white paper before starting alignment.
Most HP inkjet printers require both cartridges to be installed to function, even for black-only printing. Some models offer a "single cartridge mode" that lets you print with only one cartridge, but print quality and speed may be reduced. Check your printer model's specifications to see if single cartridge mode is supported.
HP offers a free cartridge recycling program called HP Planet Partners. You can request free prepaid shipping labels at hp.com/recycle, drop off cartridges at participating retailers like Staples or Office Depot, or use the prepaid envelope included with some HP cartridge purchases. HP recycles the materials to create new cartridges and other products.